Charger Setup
Choosing the Charger Position
A good charger position is important for reliable charging. The site needs:
- Access to power.
- A clear view of the sky. Avvy uses GPS to dock with the charger.
- The charger can be placed near the wall of a shed, but the rest of the sky should be wide open so Avvy can get a reliable position fix.
- A corridor 3–6 metres in front of the charger, with the charger facing it.
- If the charger is too close to the corridor, Avvy will not have enough room to line up with the dock.
- A corridor running across the front of the charger is ideal, because it lets Avvy choose the best point to start its approach.
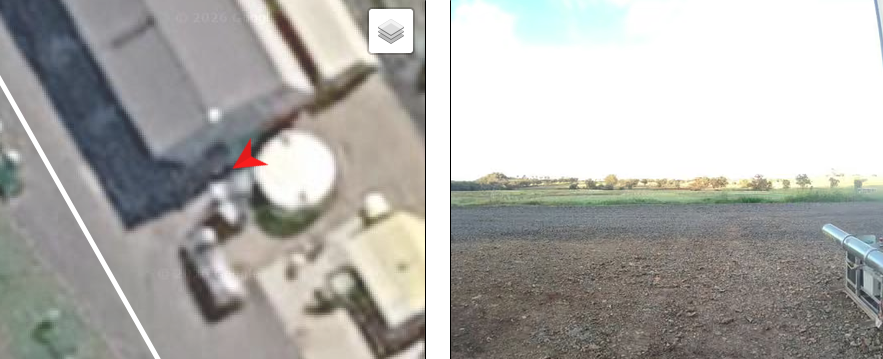
An ideal layout. The charger is set back 6 m from a corridor that runs across the front of it.
Teaching Avvy Its Charger Location
Before you start, make sure the area 2 m in front of the charger is clear. Avvy will drive forward during setup.
- Check that Avvy is not running a program. If it is, stop the program.
- Press the E-stop so Avvy can be moved by hand.
- Push Avvy into the charger until the contacts are pushed into the vertical (halfway in) position.
- Release the E-stop to re-enable the motors. Keep holding Avvy in position until the motors engage.
- In the Autonabit Dashboard, go to the Control page.
- Select the robot you are setting up the charger for.
-
Click Show advanced.
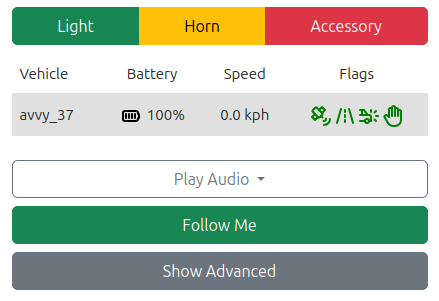
-
Click Create charger.
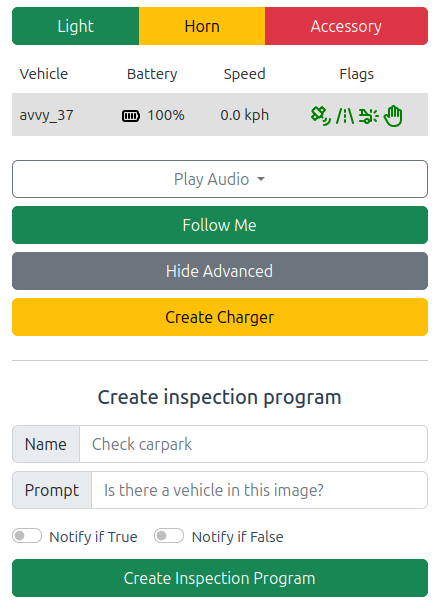
Avvy then records the charger location automatically:
- Avvy waits in position for up to 10 seconds while it records the charger location.
- Avvy drives forward 2 m to the charger's approach point.
- Avvy waits for up to 10 seconds while it records the approach point.
- Avvy stops and saves the new charge program.
Warning
When the E-stop is released, the motors will engage. Keep your feet clear of the wheels, and stand clear of the 2 m approach area once you click Create charger.